Showing posts with label hat. Show all posts

Jan 1, 2010

Hentesæt

SÅ! Nu er mit fine hentesæt af silke/alpaca endelig færdigt, og der er over en måned til jeg skal føde!

DSC01930

Kysen var en katastrofe, som har ligget og ventet på redning i nogle måneder:

DSC01718

men det tog ikke lang tid at redde den da jeg indså hvad der egentligt stod i mønsteret på et vist tidspunkt "fortsæt i retstrik". Hmm. Man skal altså kunne læse for at følge et mønster...
Da det først var fikset blev sokkerne også færdige på et par dage.

DSC01923

Jan 20, 2009

Rescued Baroness

I needed a gray hat. And how often can you really truthfully say that you need to knit something?? I wanted it simple, so I picked the Baroness Beret pattern by Susan Power at Knit Therapy. A pretty good pattern, with the exception of the use of k2tog tbl which looked bad, so I used ssk instead. It uses a tubular cast-on, which I hadn't tried before, but it was not terribly difficult with these directions. The hat turned out perfect, but when I washed it, it sort of collapsed into a streched huge bag. Noooo!!!
After storing for a few days to consider my options, I rescued it with a very thin elastic thread through the rib:This solved the problem perfectly, so now the hat looks like this, just what I imagined (although maybe a hot iron wouldn't harm it):

Jan 9, 2009

Felting

Here's the story of some real felting, not "just" fulling of something knitted. Annie invited us (Debi and me) to try it in her studio. Tusind tak, Annie! Det var virkelig hyggeligt og spændende at lære.
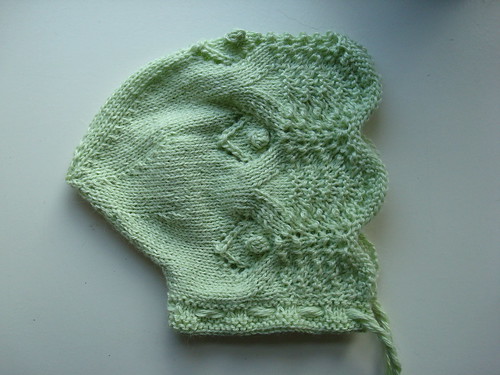
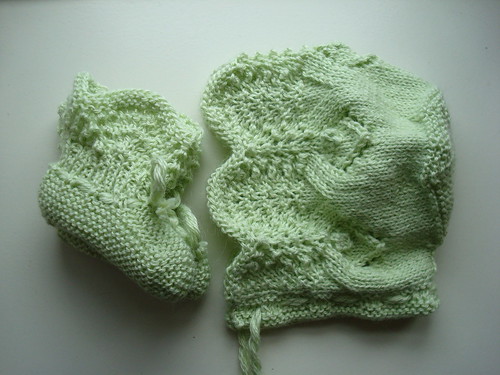
We made two hats, each constructed on a ball, in three layers of wool. In the first layer, the fibers of the roving are vertical (right hat), while the second layer is wrapped in a spiral (left hat), putting the fibers horizontal:
The third layer is again vertical, and is - more or less - the only layer that shows in the end, the second layer peeking through just a bit. We decorated the third layer with different colors of roving and scraps of yarn to give interesting effectsNow comes the part with the hot soapy water. The entire ball with wool is wrapped in nylon stockings with the legs cut off (two pairs) that are knotted tightly. This keeps the wool more or less in place during the bouncing stage (yes, technical term) where the entire assembly is bounced in the hot soap water for 10-15 minutes. This felts the wool together, forming a fabric (which is strong because its three layers are at right angles to each other).
Now comes the fulling stage, in which the hat is rubbed against a washing board, or in our case a tray for paint. This makes the fabric shrink and thicken (the only stage you go through with items that are knitted, because they are already a fabric when you begin)We fulled the hats until they fit, trying them on several times on the way, and shaping them to our heads and taste. I kept my hat round, Debi made hers flat on top. This is maybe the most interesting stage, where the wool can be bent and worked. In the very end, we ran the hats on a wool program in the washing machine to wash out the soap, followed by some final shaping (as the machine washing shrinks the hat somewhat).


Hello there, we may look a bit funny, but so would you if you had wet wool with lots of soap on your head:

Aug 12, 2008

Hat and mittens, done!

Finally! Hat and mittens are done:The mittens have a braided string (70 cm, hope it is long enough) between them, in theory rendering them impossible to loose. The hat has a picked-up edge around the face, picked up through both knitted layers and sown to the inside:
The verdict: the set turned out quite cute in the end. Very fluffy, warm, soft. I wish I had a (much) smaller head.

Jul 14, 2008

Baby hat and mittens

This is the hat and pair of mittens I am making for Iris aka "the Worm" as a peace offering. The design is by Birgit Østergaard for Marianne Isager. The main color is a white Tvinni Tussah (merino wool/silk), with a sage green contrast of Tvinni (wool). Hat and mittens are lined with sage green mercerized cotton.
The hat is knitted in one piece, starting with the rib around the neck, then a stockinette piece for the head. There is a contrast stripe on top. Then, the stitches for the lining are picked up on the inside (of course with the wrong sides facing each other), and the lining knitted in stockinette to the same length as the outside. I finished both inside and outside with 3-needle bind-offs. Here is the hat seen from the side:

I'll pick up stitches in both outside and lining, and knit an edge in sage wool that will surround the face (the lower edge in the picture).

The outside is wonderfully soft, and with the lining, the whole hat is very warm and fluffy. But I have to say this is some of the most boring knitting I have ever done. It just went on and on. On 3 mm needles with this thin yarn (100 g/3.5 oz is 510 m/558 yd), the number of stitches was maybe the same as in an adult sweater. So Iris, we are more than even now!!

About the mittens in the next post.